
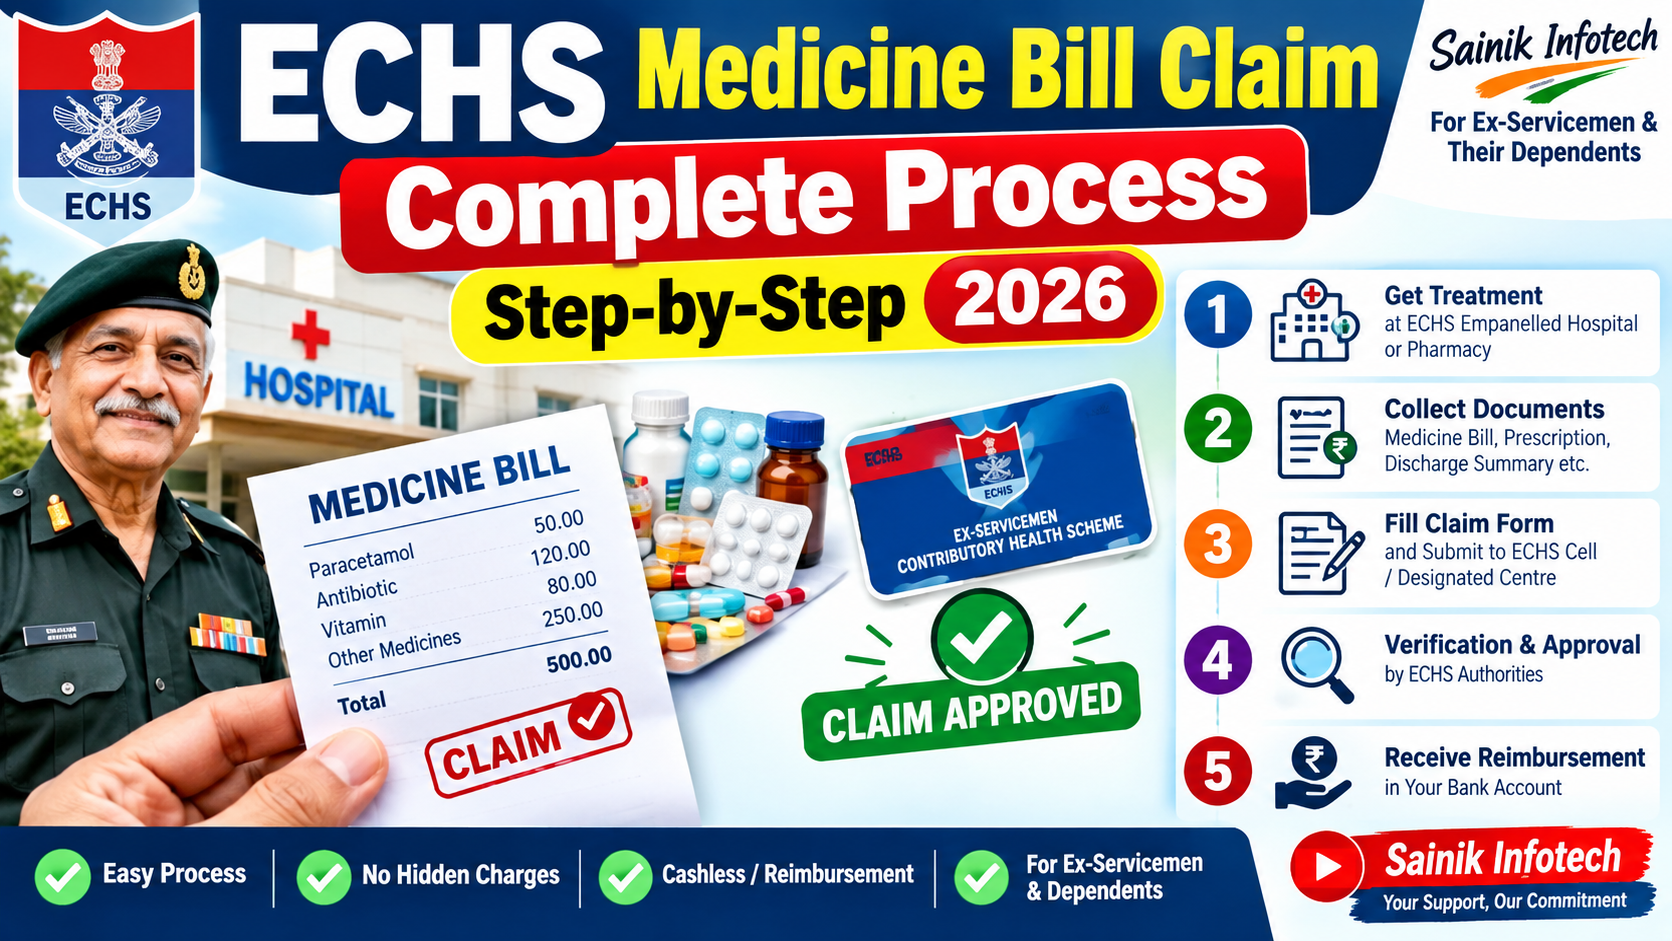
ECHS Medicine Bill Claim Complete Process Step-by-Step 2026
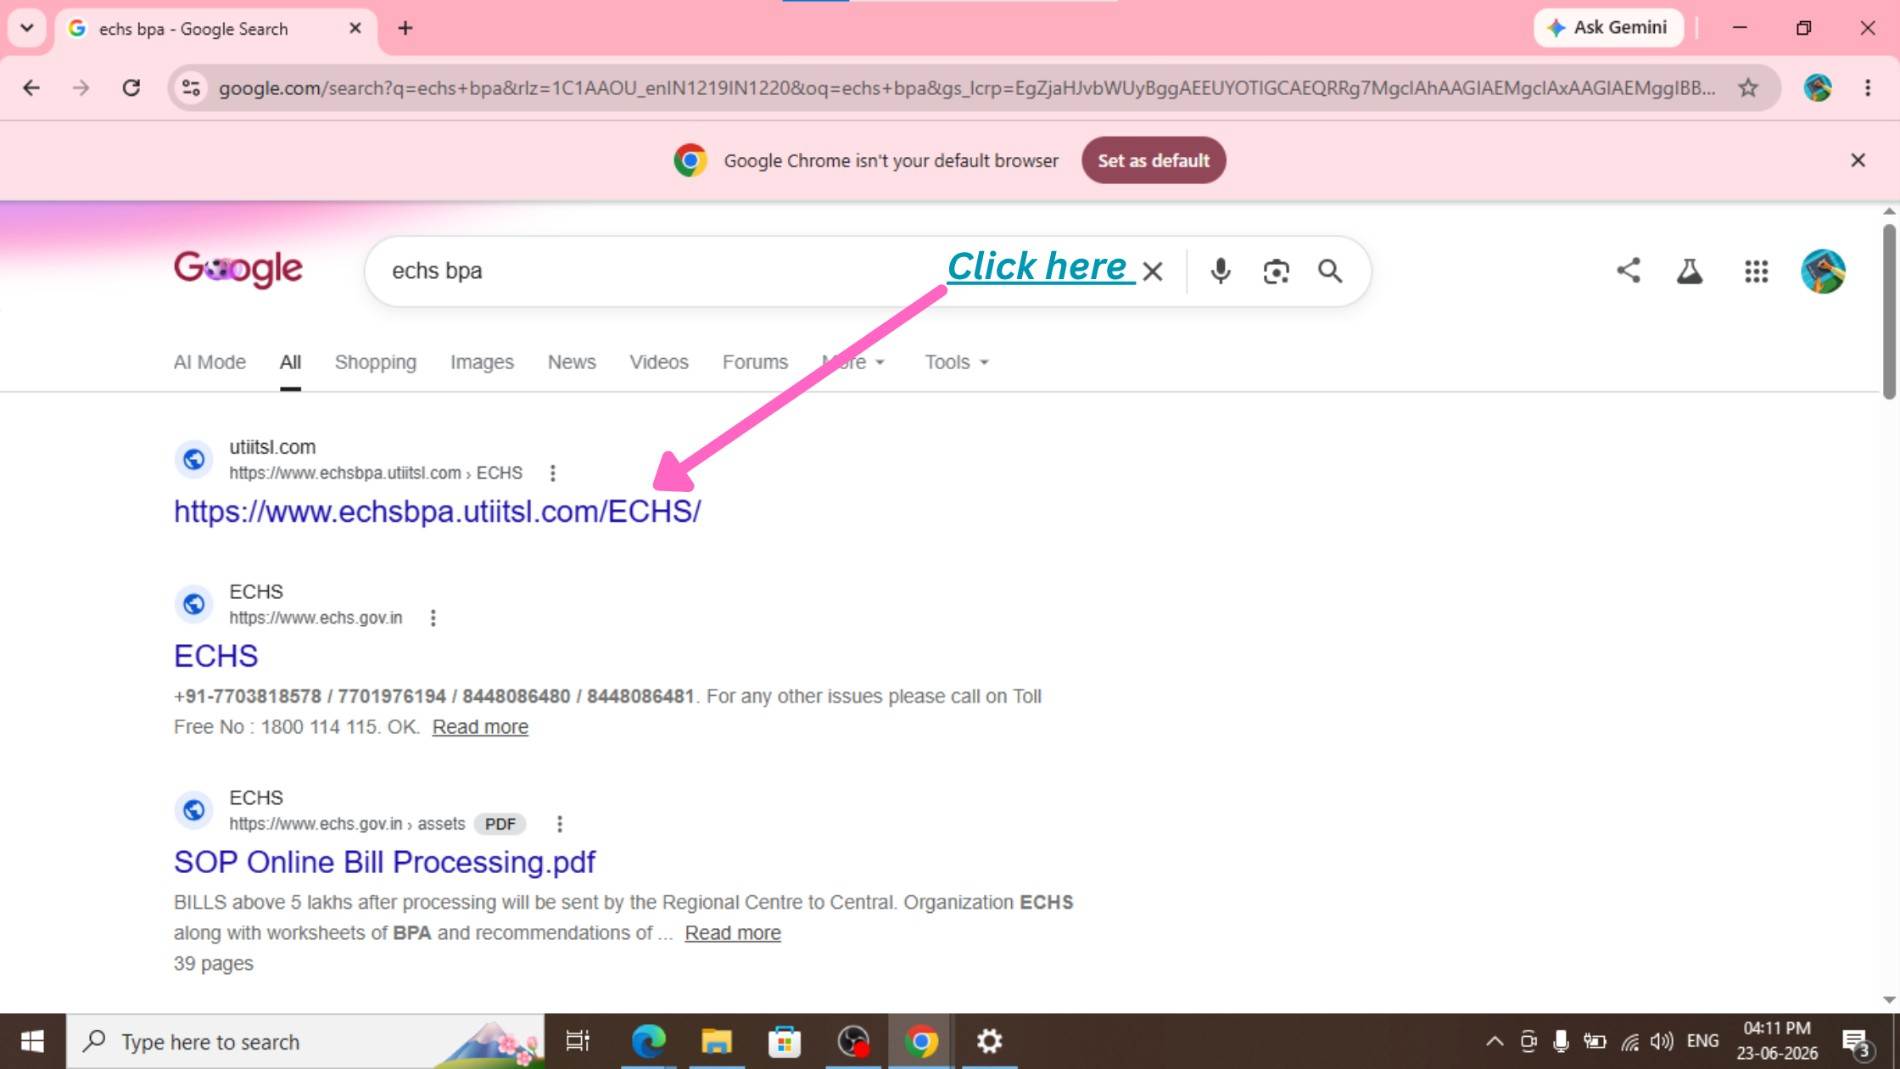
Step 1 – Apne mobile/computer me Google Chrome open kare aur Search bar me ‘ECHS BPA’ type karke search kare. First result me ECHS BPA (Bill Processing Agency) ki official website milega, us per click kare. 👇
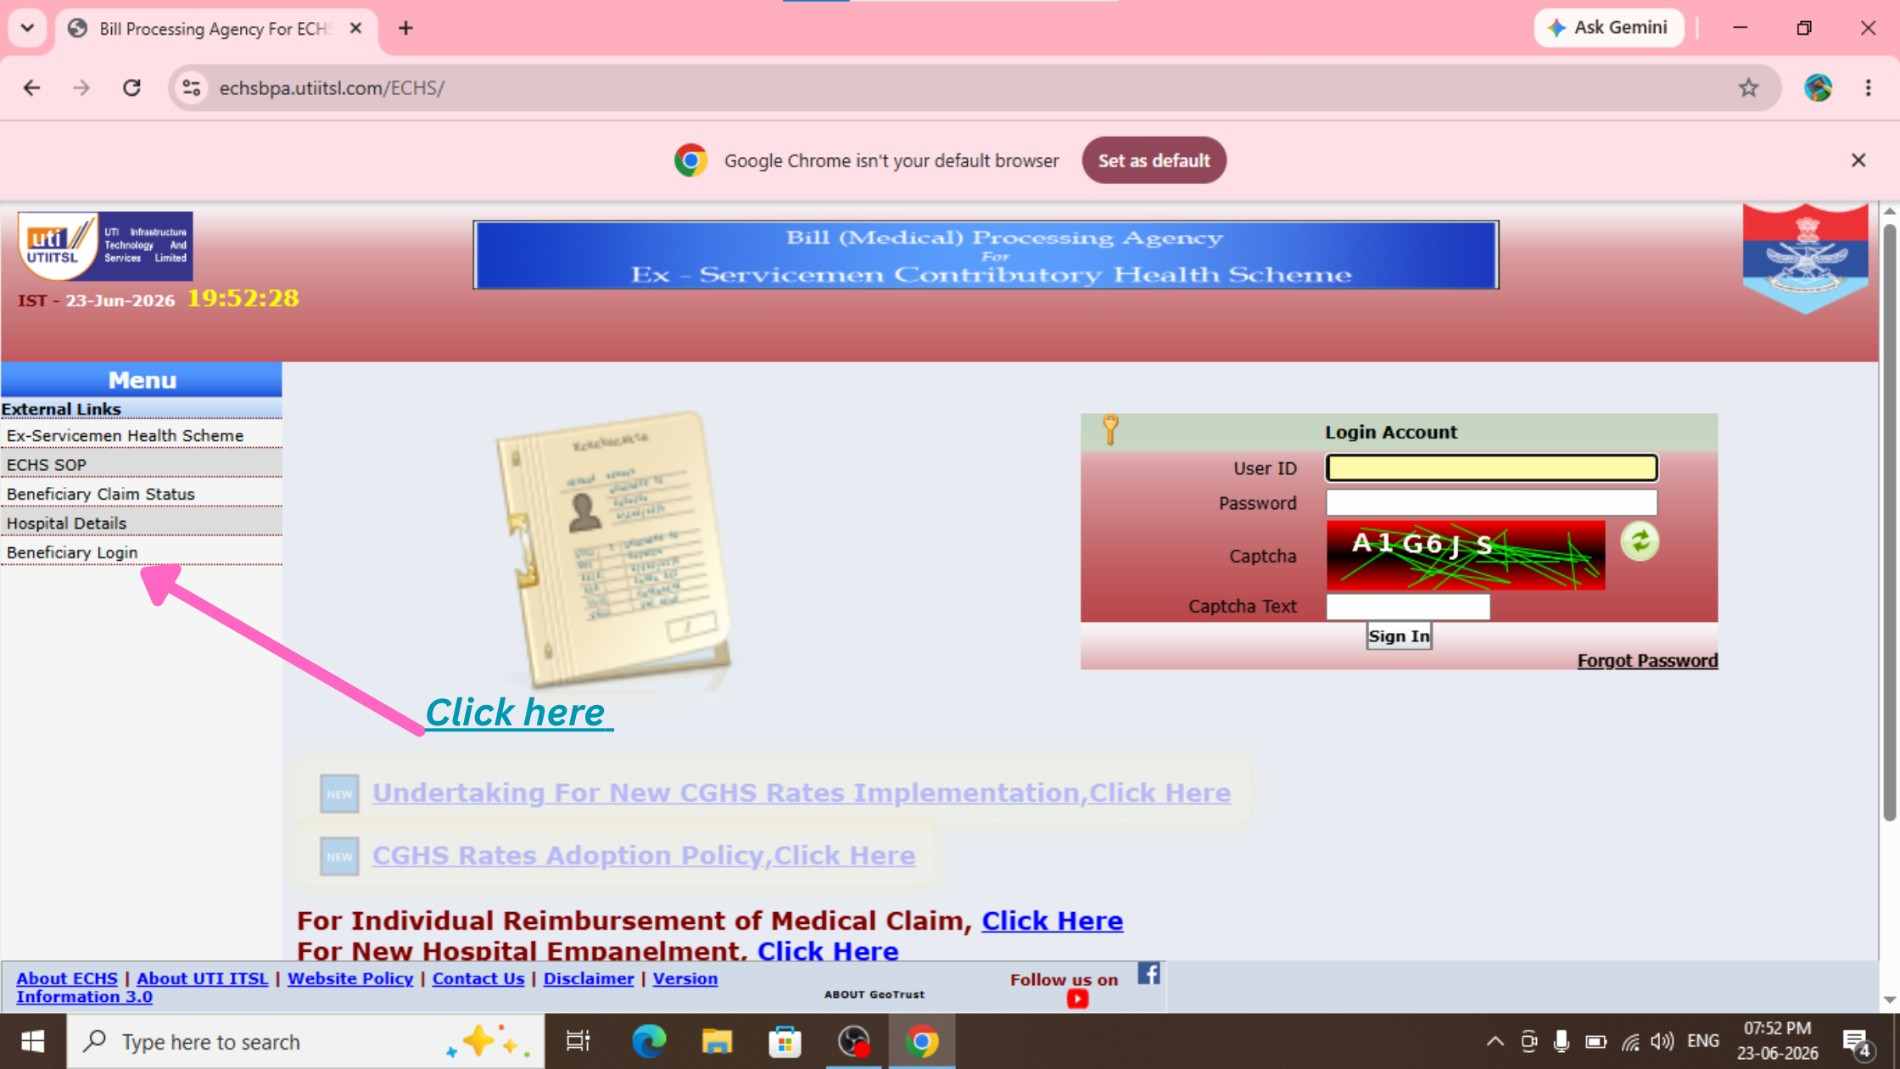
Step 2 – Left side screen par Menu option dikhega. Menu ke niche ‘Beneficiary Login‘ option hoga, uspe click kare.👇
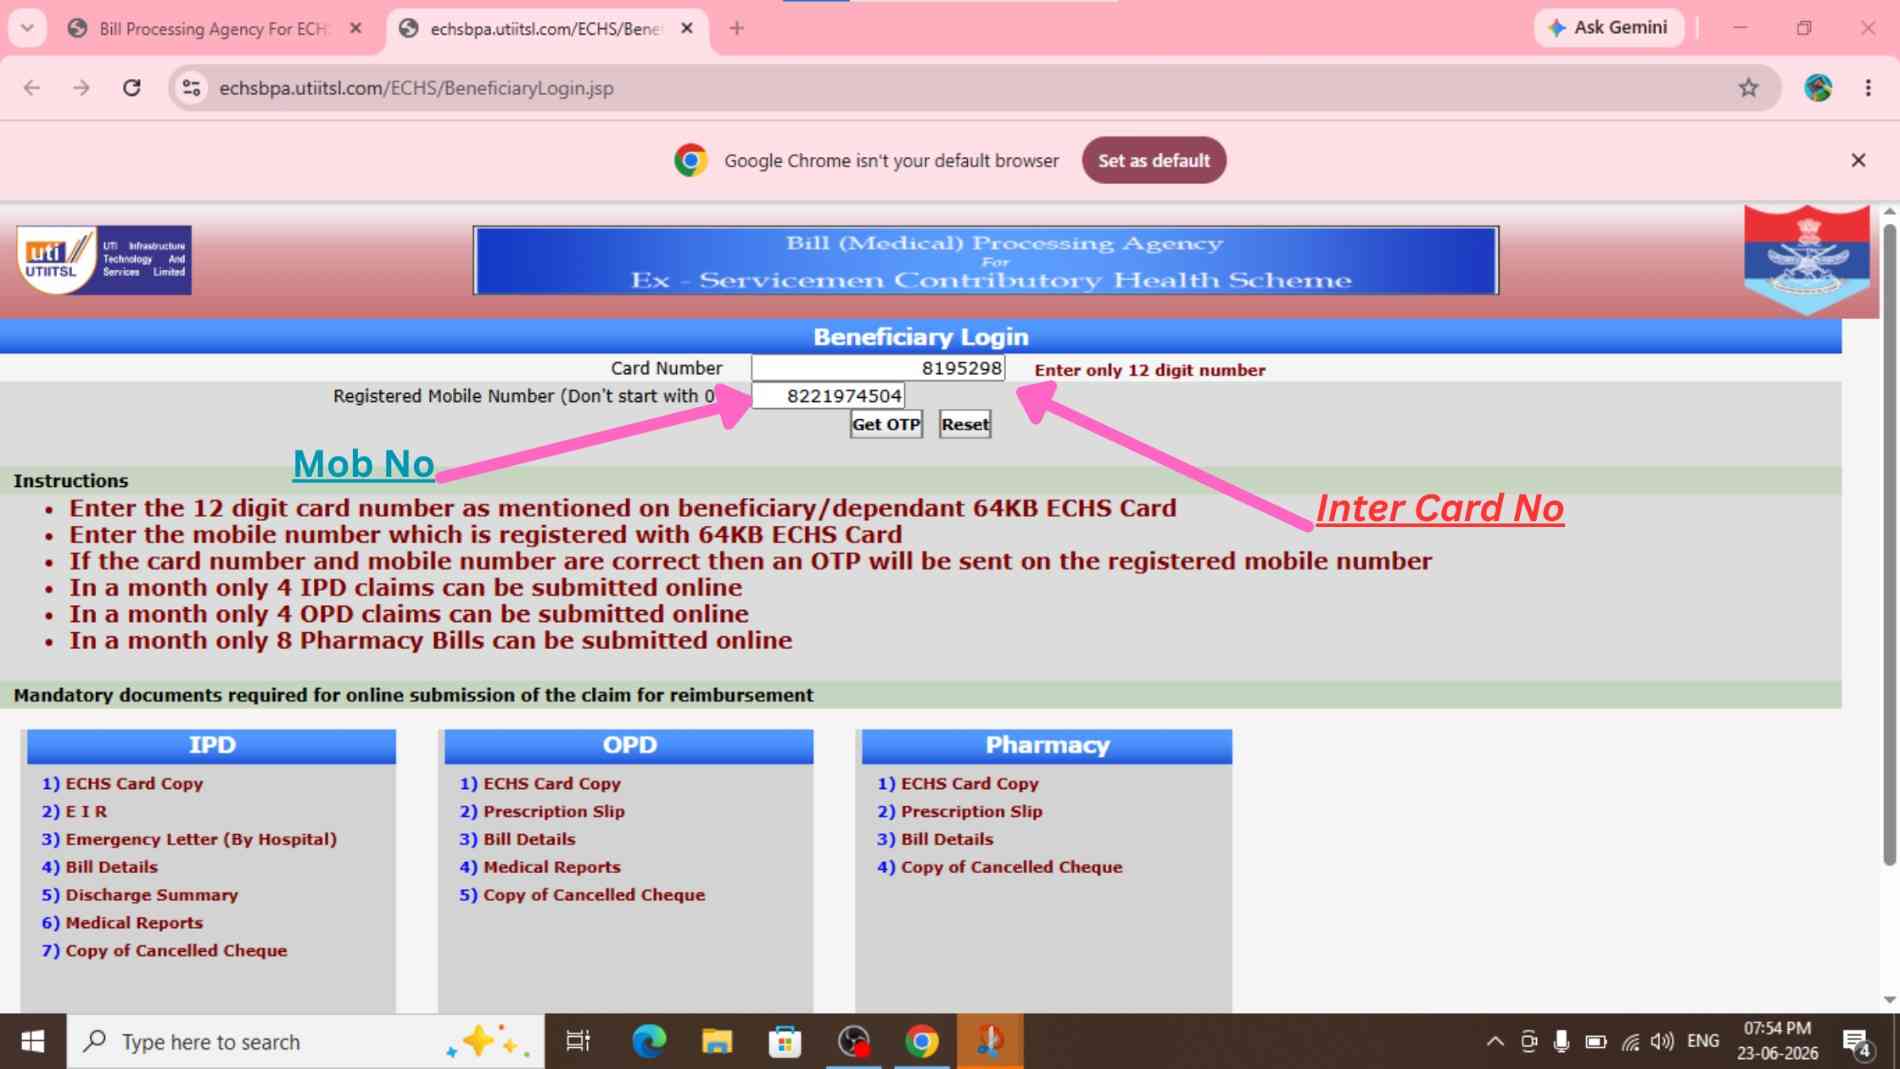
Step 3 – Apna ECHS card number type kare. Zero ke baad ke digits hi dalne hain. Example: agar card no. KL0000456389 hai, toh sirf 456389 type karein. Uske baad apna registered mobile number enter karein aur ‘Get OTP‘ par click kare.👇
Step 4 – Screen ke left side par ‘Member Claim’ option par click karein. Fir ‘New Claim‘ select karein. Middle screen me 3 options dikhenge – Out Patient, Pharmacy aur In Patient. Aapko ‘Pharmacy’ select karna hai aur last me ‘Submit’ par click kare.👇
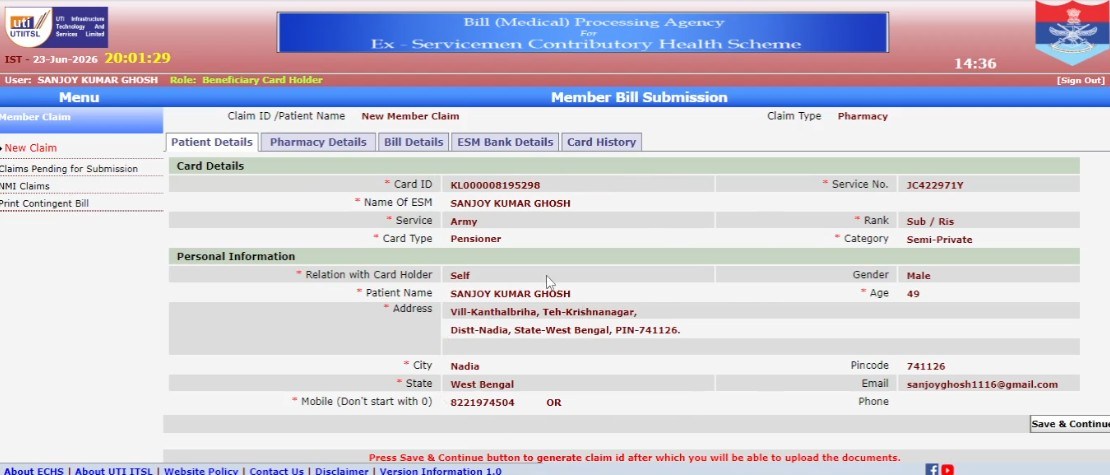
Step 5 – Prescription ke according Polyclinic Name, Visit Date aur Time fill kare. Remark section me sirf ‘OPD Consultation‘ likhein. Fir niche ‘Save & Continue’ button par click kare.👇
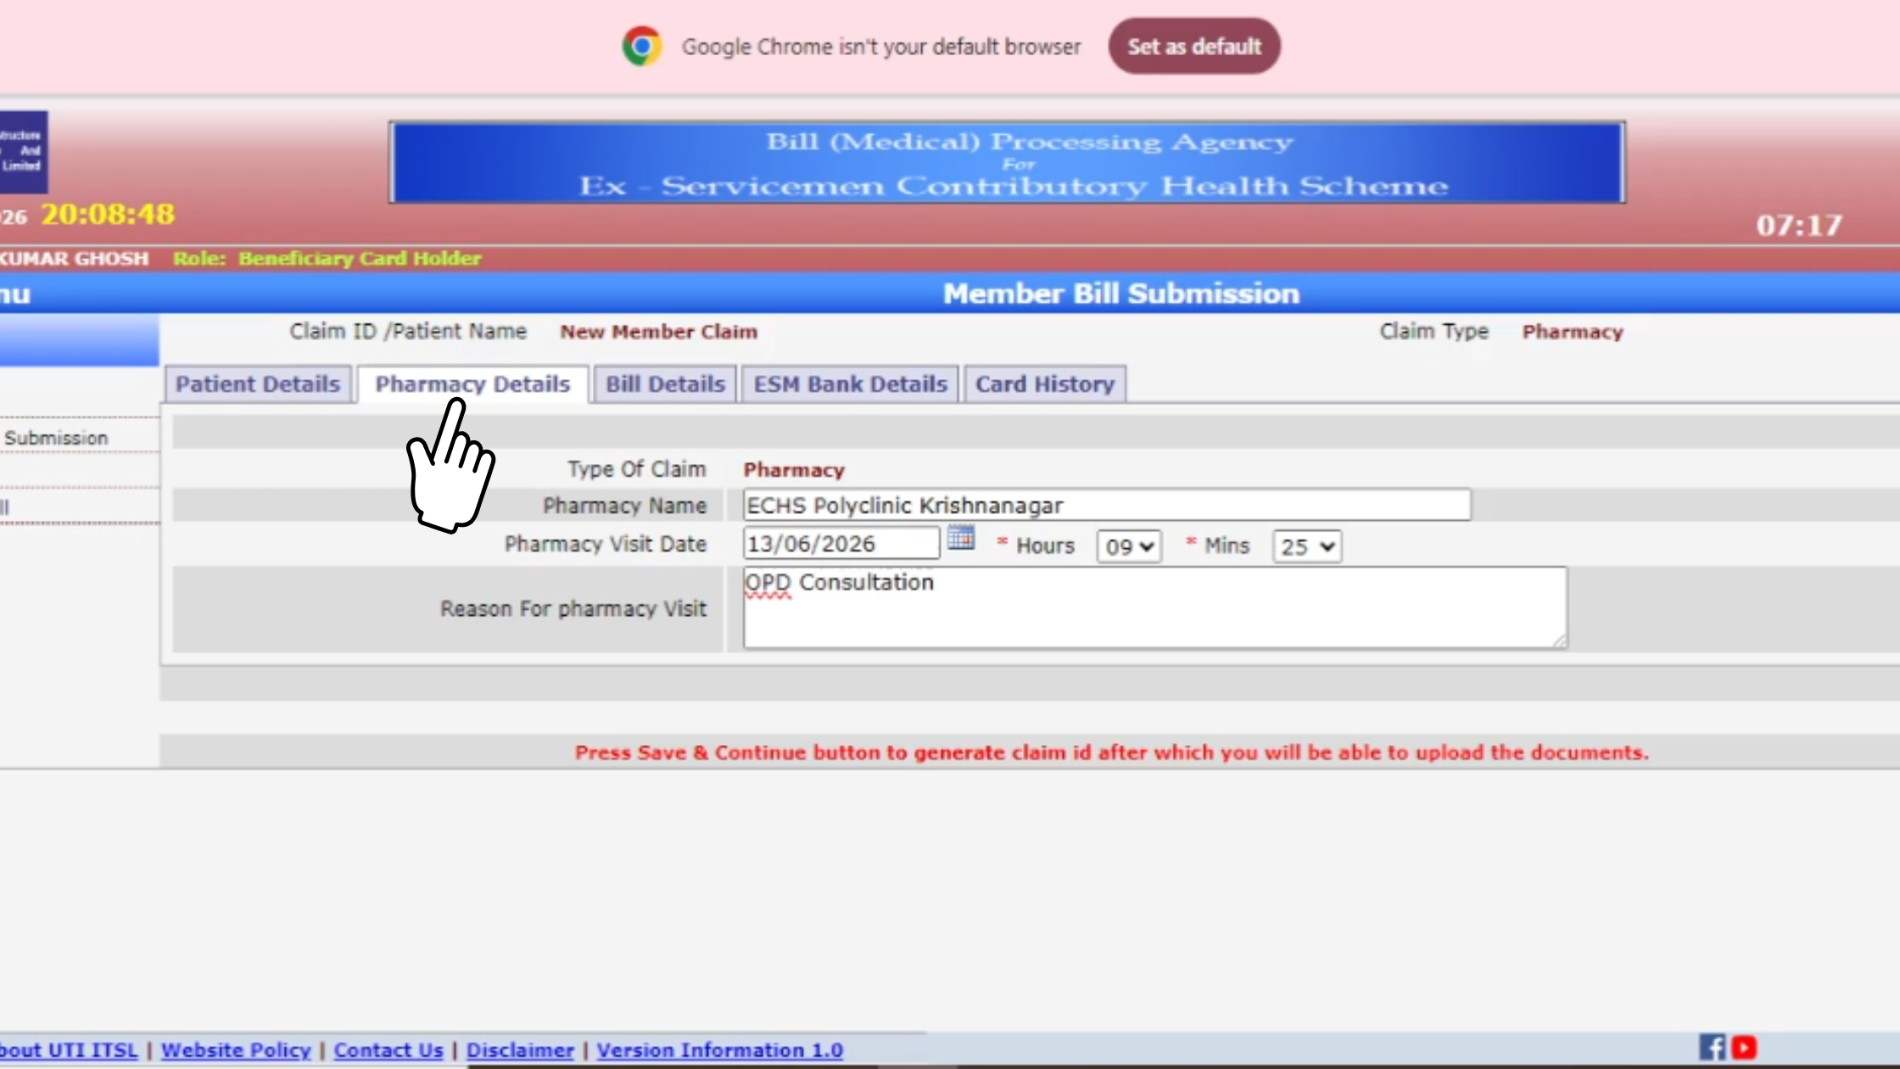
Step 6 – Click karte hi apke screen per ek notification aayega aur ek Claim Id generate ho jayega. Sath hi apke screen per Upload Documents ka ek naya option khul jayega. Close per click karke notification ko band kare. Uske baad Bill Details wale option me click kare👇
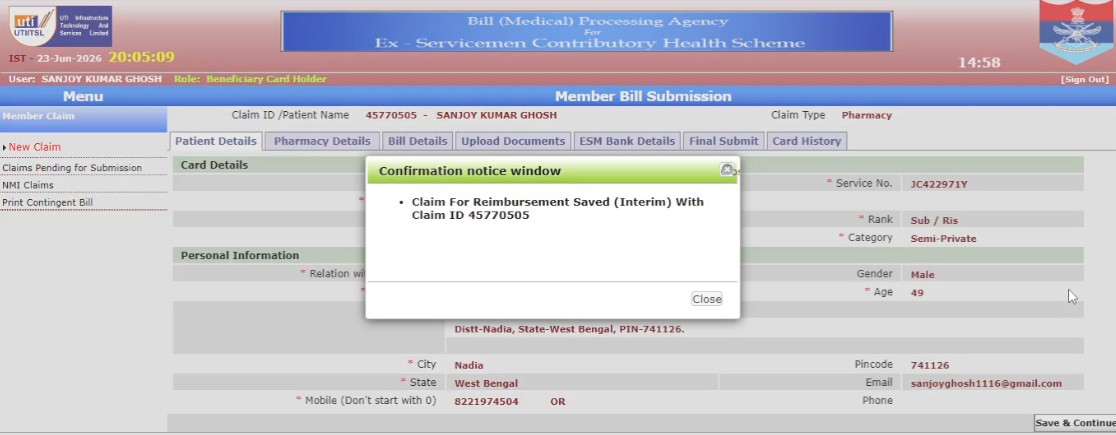
Step 7 – Medicine bill ka Bill No/Invoice No, Purchase Date aur Amount fill kare. Sab details fill karne ke baad ‘Upload Documents’ option par click kare.
Note: ‘Save & Continue’ par click karne ki zarurat nahi hai. Ensure karein ki medicine ka GST Bill ho aur bill par proper Stamp laga ho.👇
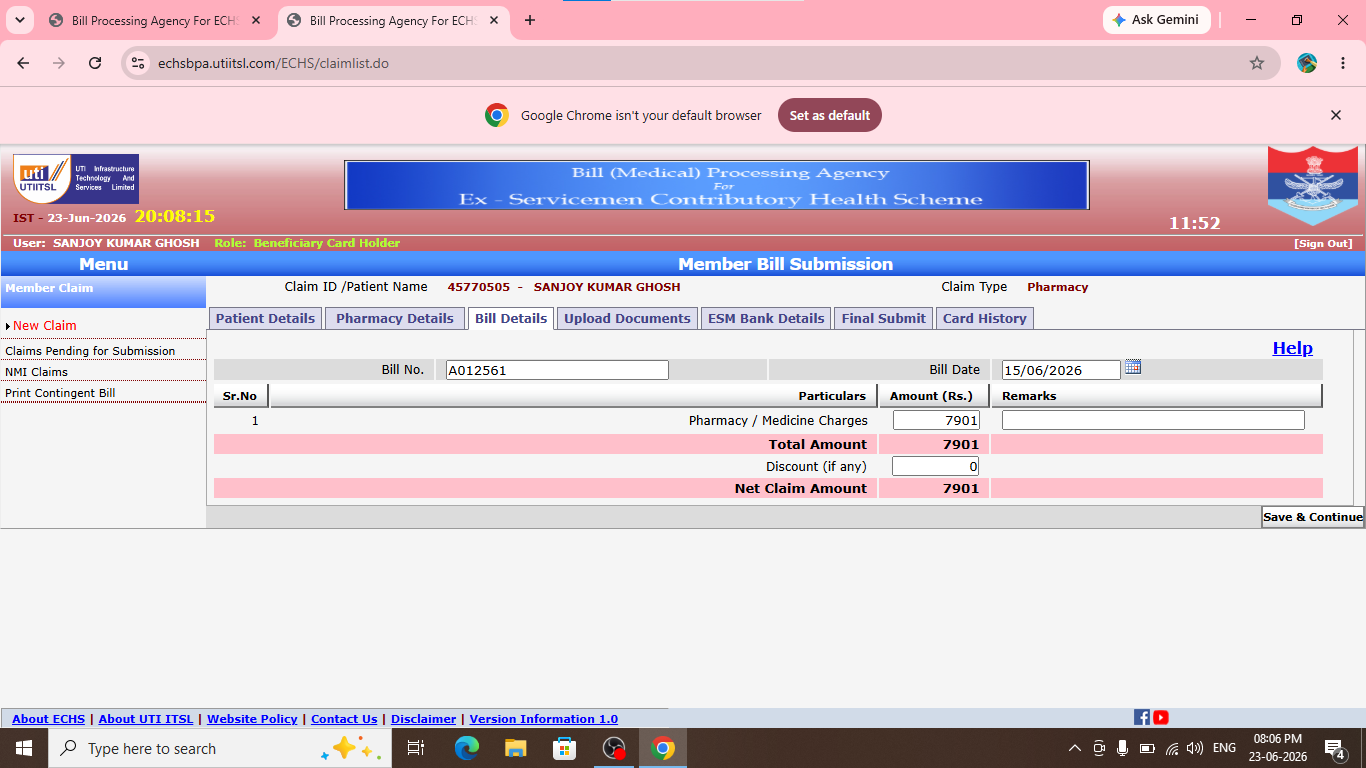
Step 8– Patient ka ECHS Card, Prescription, Medicine Bill aur Cancelled Cheque ka PDF upload kare. Documents upload karne ke liye:-
a) Sabse pehle document ke samne wale round shape par click karke select karein.
b) Phir niche taraf Choose File button par click karein.👇
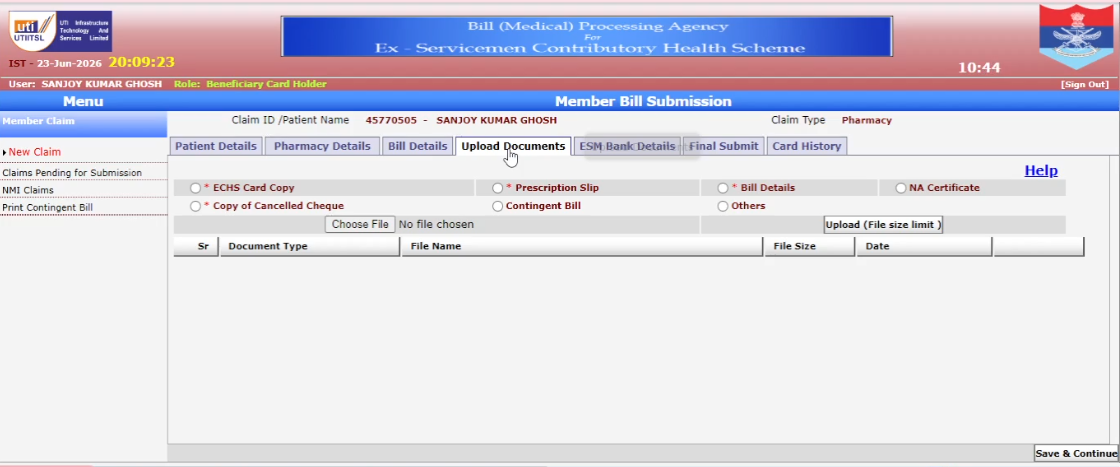
Step 09 – Click karte hi aapko File Option dikhai dega. Ab jahan par apne PDF Save kiya hai, wahan se apna PDF select karke file Attach kar dena hai.👇
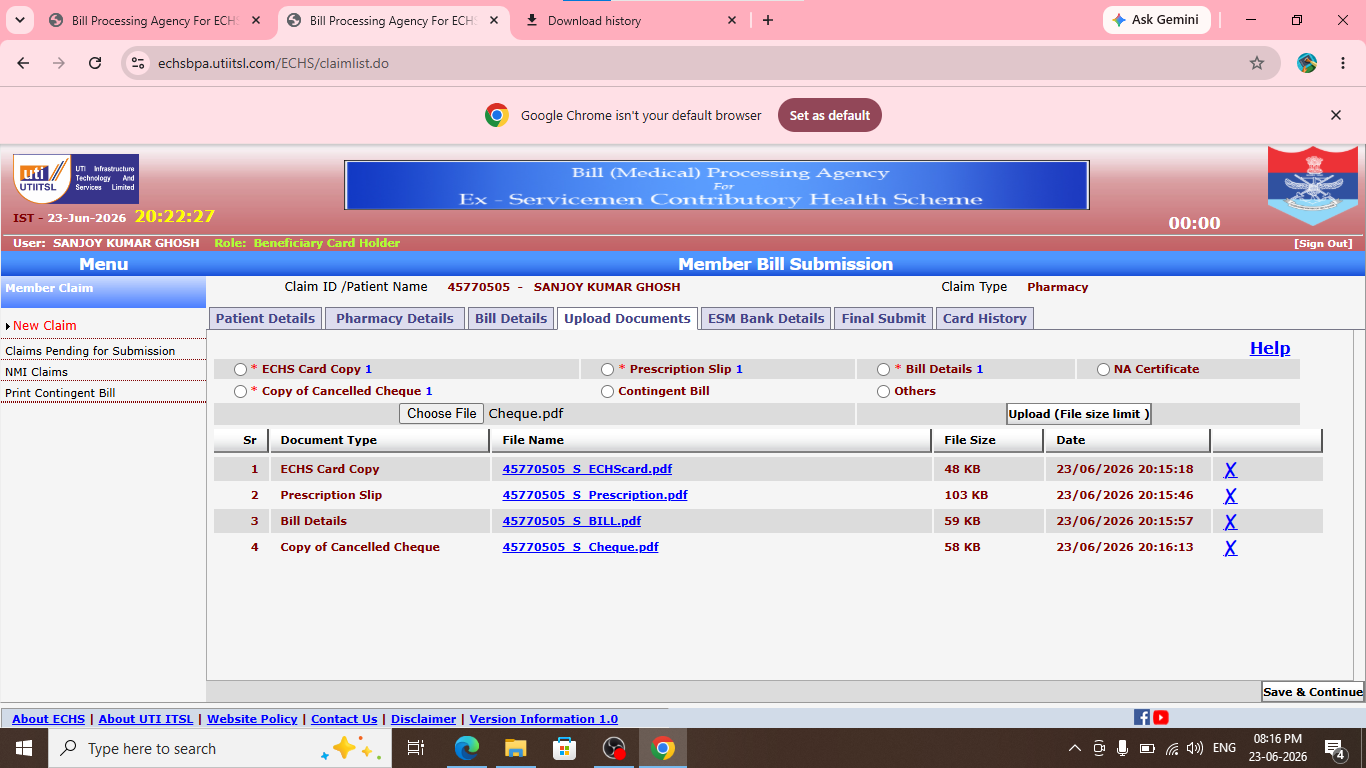
Step 10– PDF attach hone ke baad ‘Choose File’ ke samne apko apna PDF Document dikhai dega. Screen ke right‑bottom par Upload File click karke documents upload kare. Sabhi Star Mark Documents ko upload karna zaruri hai. Uske baad ESM Bank Details option par click kare.👇
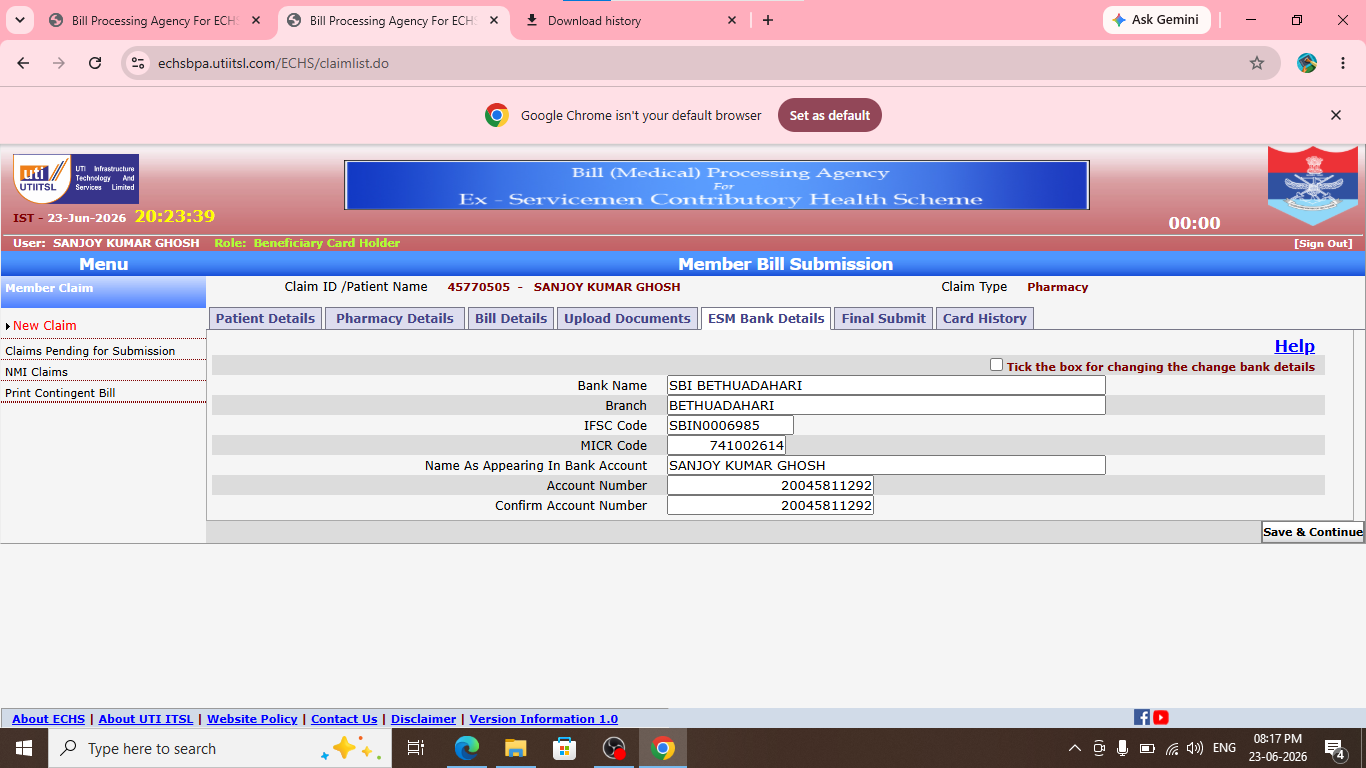
Step 11 – Apne bank account details fill karein. Dhyan rakhein, jis Cheque Book ka PDF upload kar rahe hain, usi ka hi details likhna hai. Uske baad Final Submit option par click kare.👇
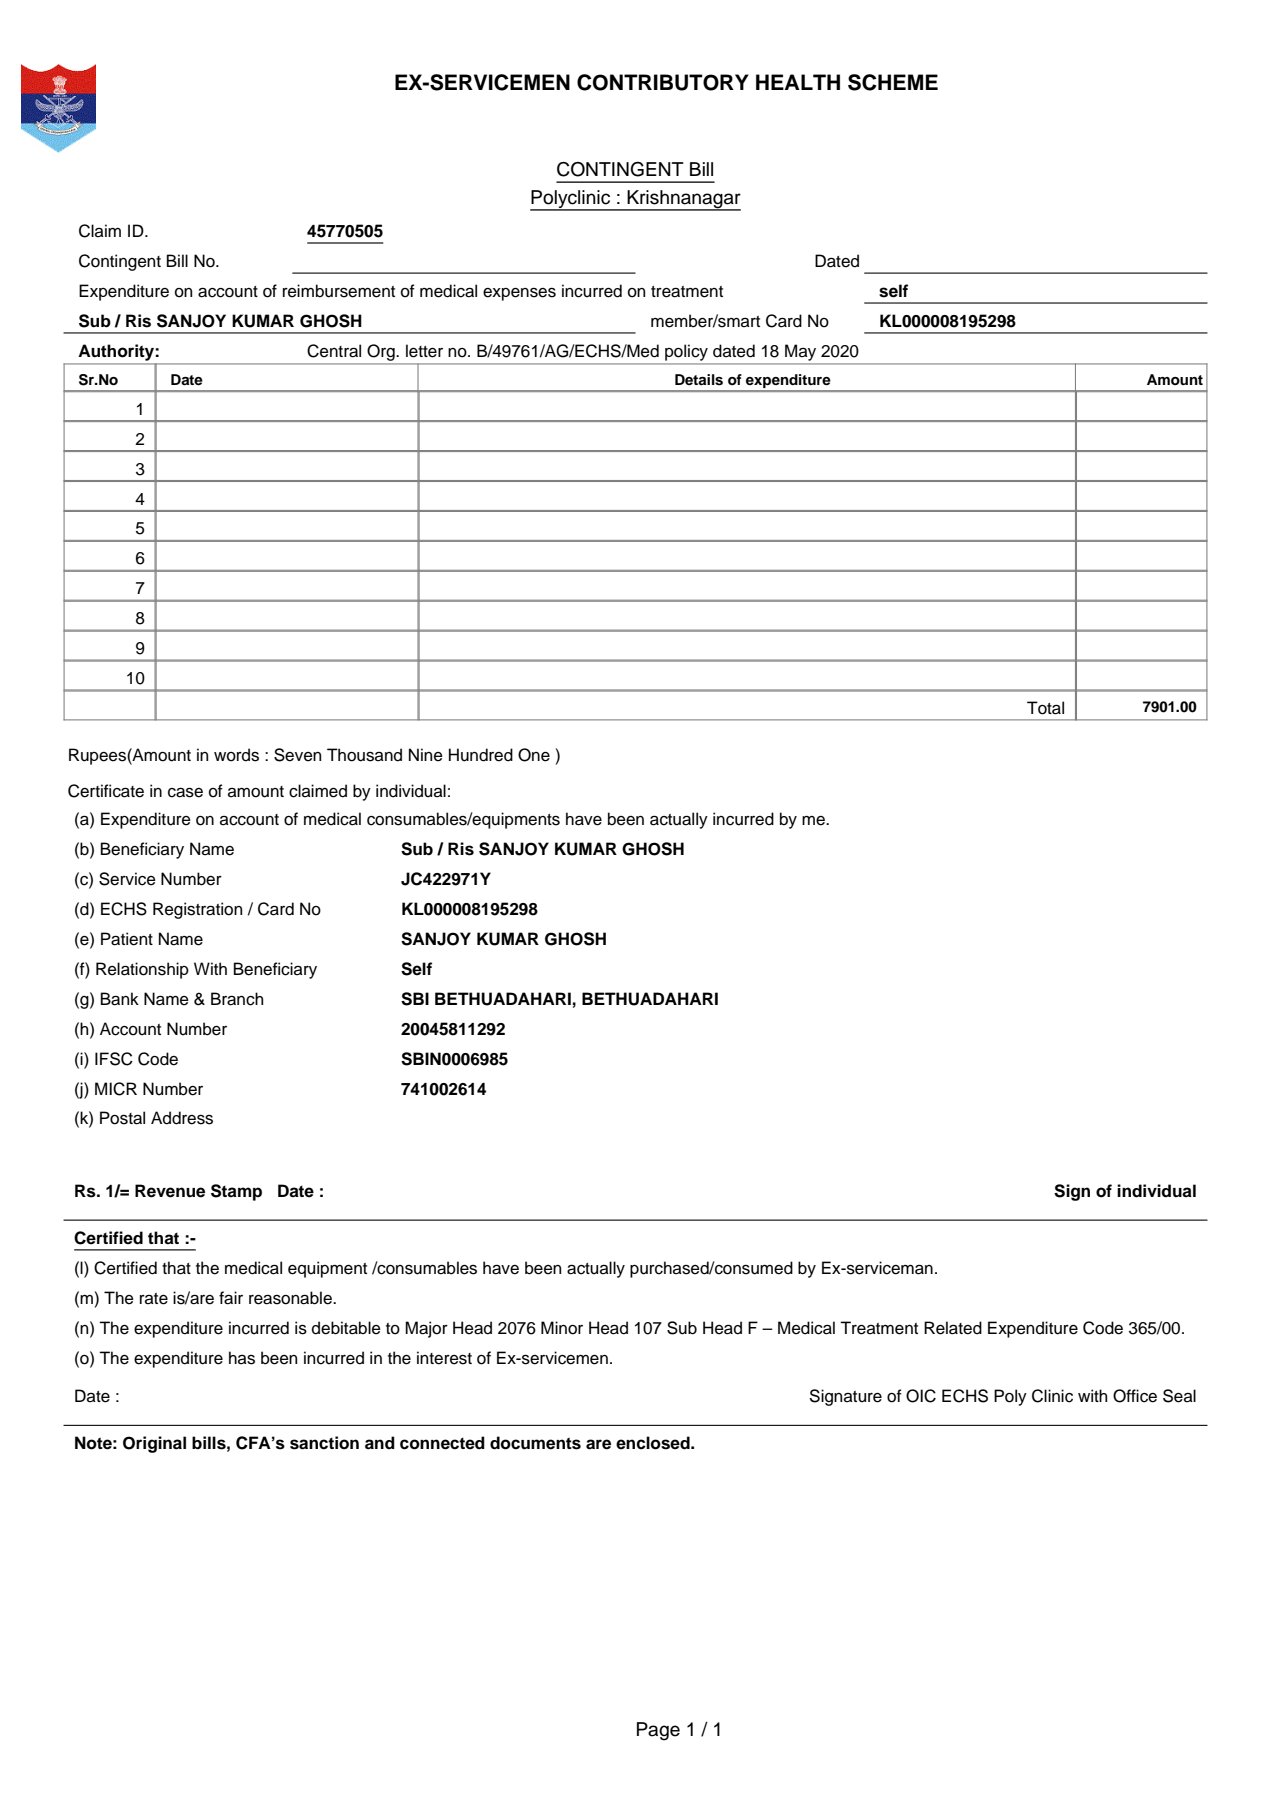
Step 12 – Click karte hi screen par naya page open hoga. Sabse pehle niche box select kare. Phir Download Contingent Bill par click karke download karein. Uske baad Final Submit option par click kare.👇
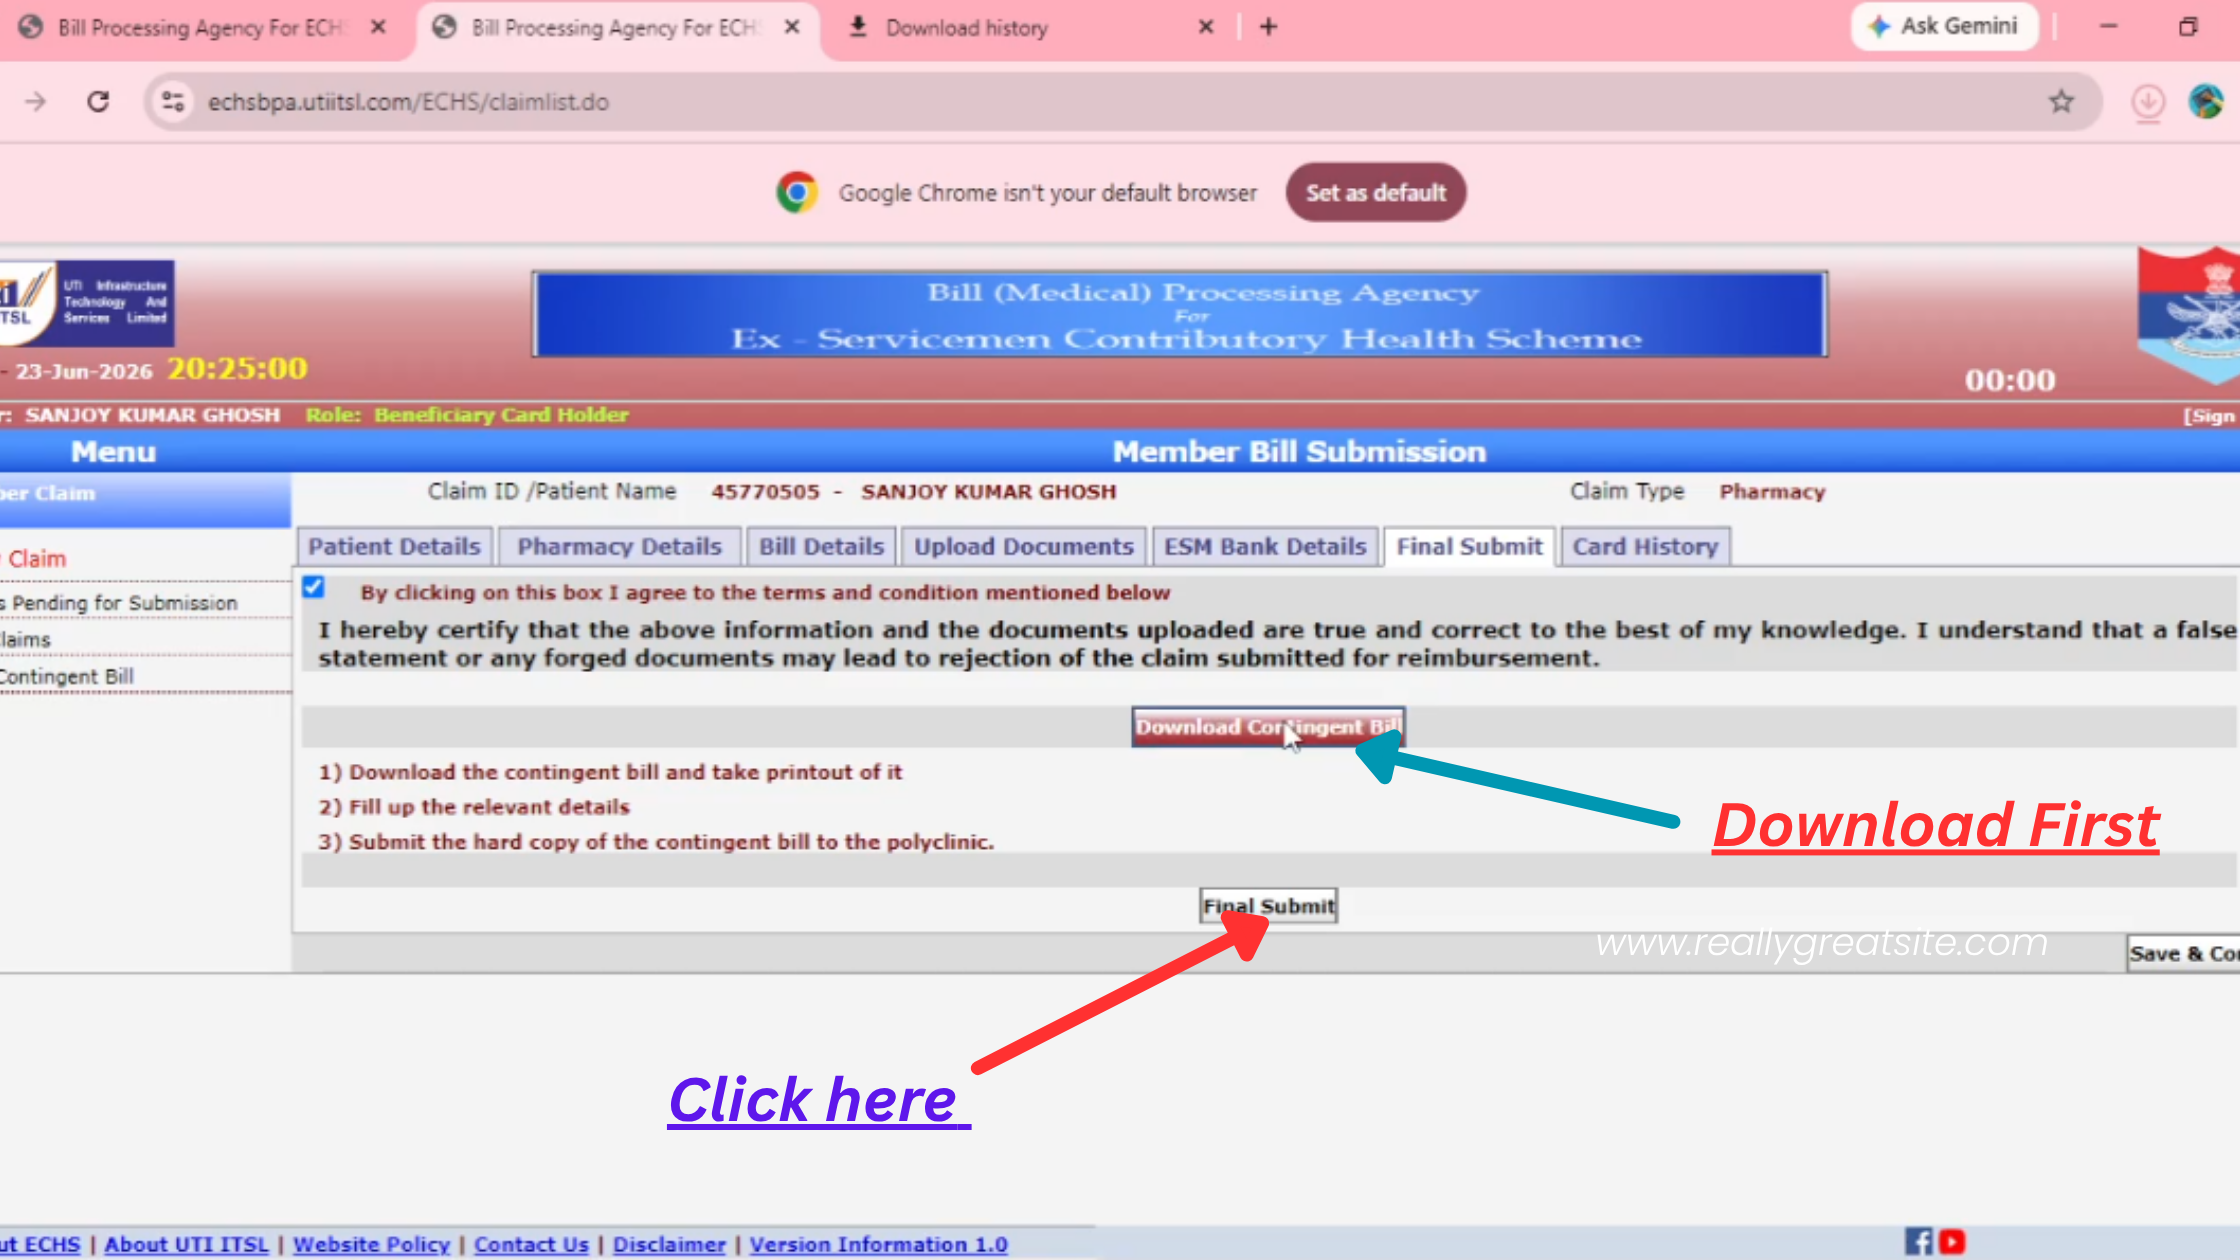
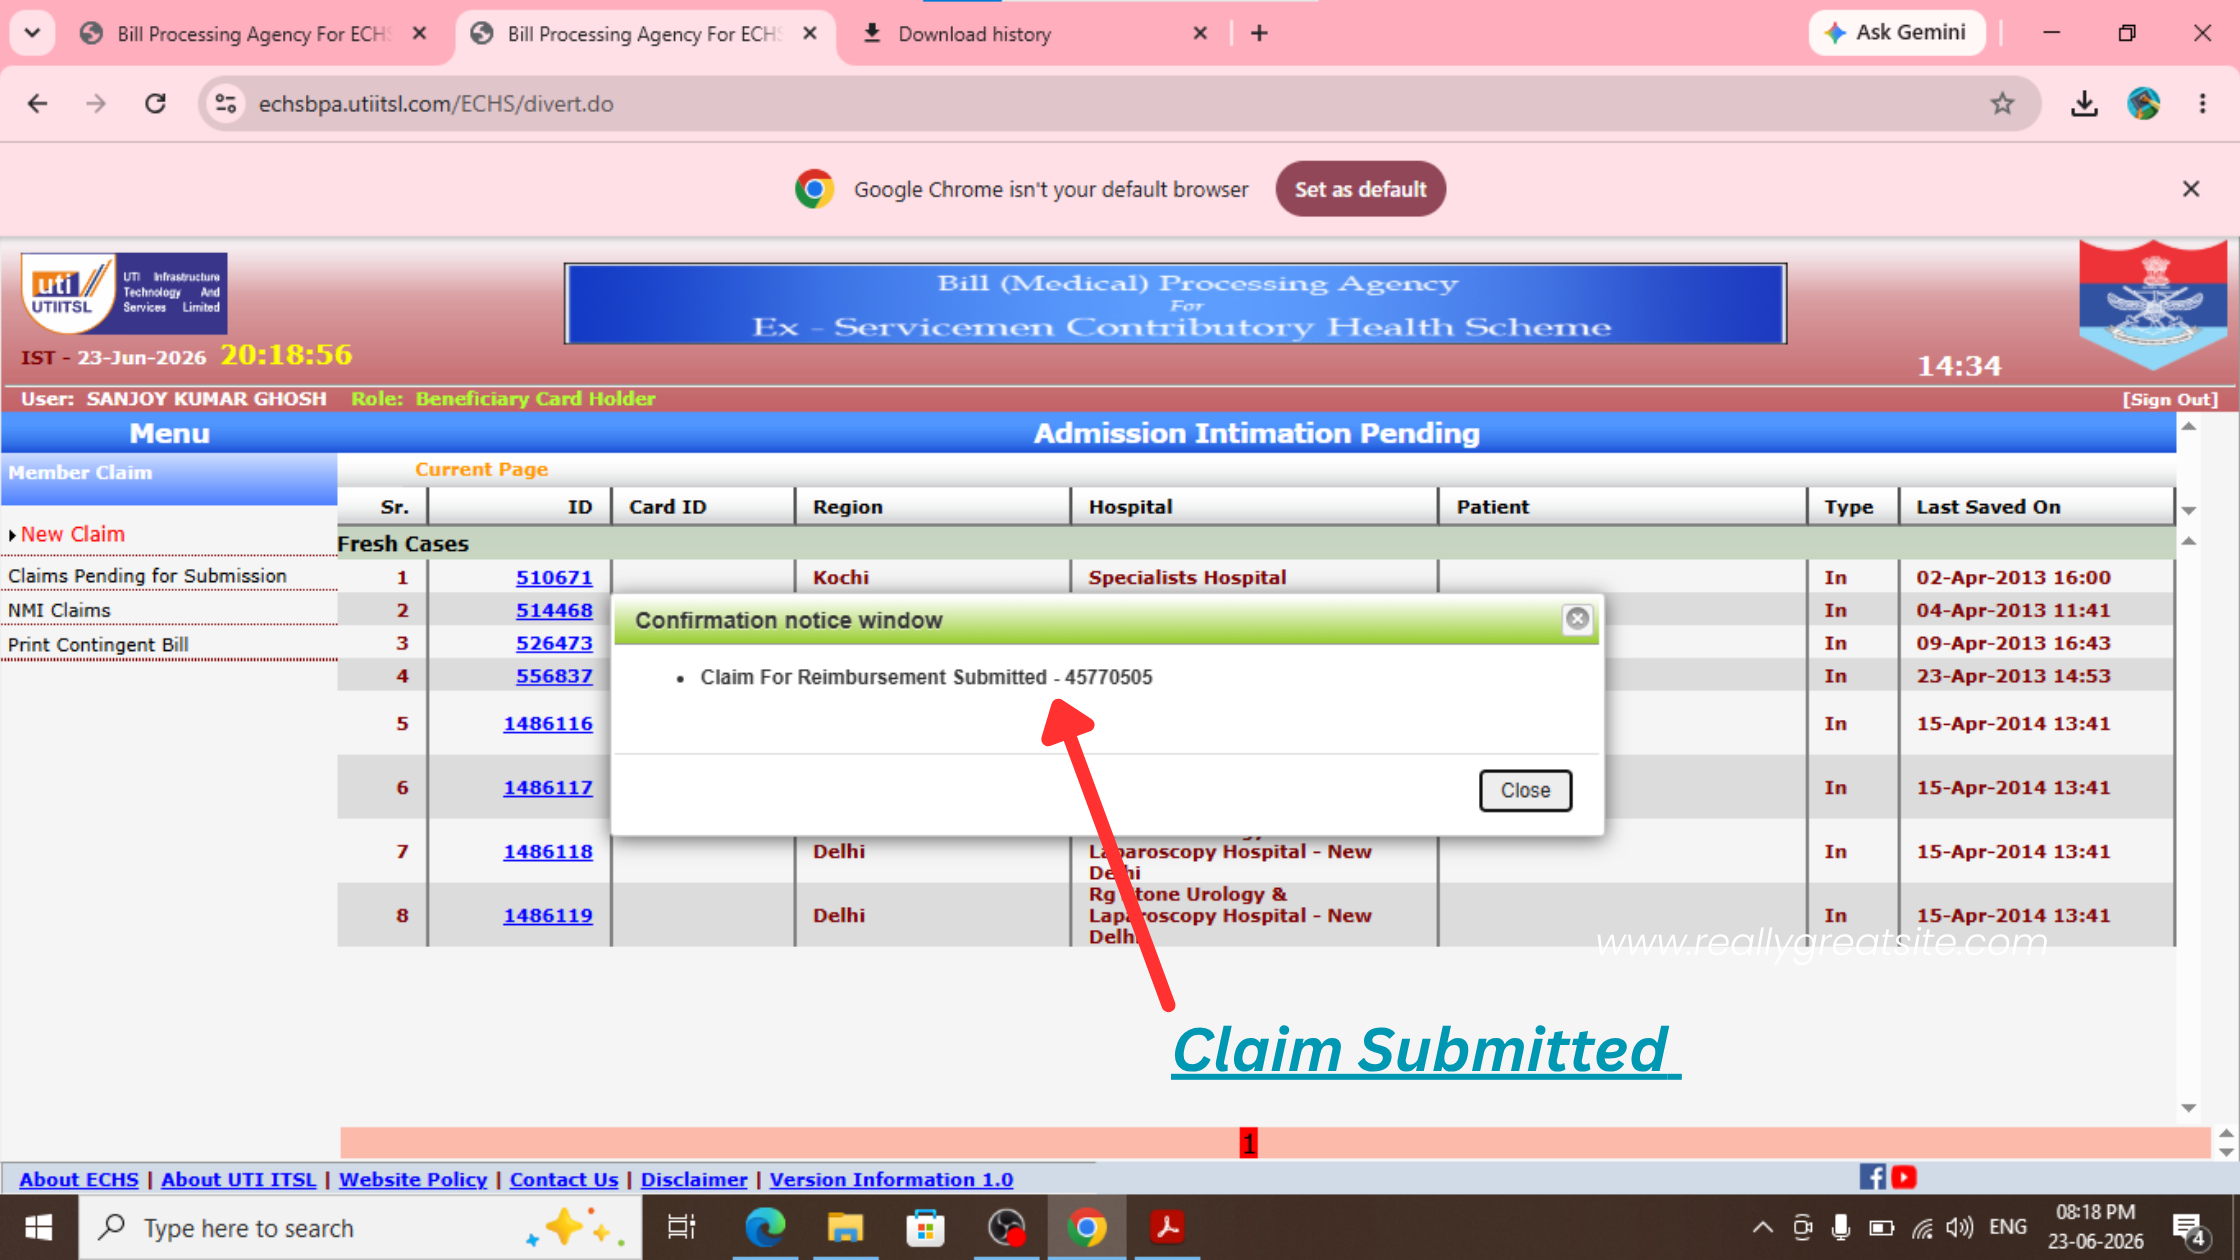
Final Submit – Click karte hi apka claim successfully submit ho ja jayega. Jay hind 🇮🇳
📑 ECHS Contingent Bill Process
Sabse pehle apko Contingent Bill ka Xerox karna hai aur usme details fill karni hai – Medicine Purchase Date, Medicine Name, Amount. Total amount last me match hona chahiye.
📂 Required Documents:-
Contingent Bill, ECHS Card, medicine Bill (GST & Stamp), Prescription and Cheque Book Xerox. Ye sab apko apne Polyclinic me jama karna hai. Claim approve hone ke baad paisa directly aapke bank account me aa jayega.
💻 BPA Site Check:-
Apko time‑to‑time BPA site login karke claim status check karna hai. Agar koi observation aata hai toh usse clear karna zaruri hai, warna claim pending ho jayega. Observation check karne ke liye NMI Claim option me jaakar apne Claim ID per click kare.
🇮🇳 Jai Hind